

Water Storage on the Trail: Choosing Durable Containers
Have you ever reached into your rucksack at the end of a rainy day in the Lake District, only to find your dry layers soaked by a split bottle? It's a frustrating rite of passage for many hikers. Finding the right outdoor water storage isn't just about carrying a drink; it's about protecting your expensive gear and ensuring you stay hydrated without that dreaded plastic aftertaste.
We agree that managing weight on a long trek is hard enough without worrying about leaking containers or confusing safety standards. This guide will show you how to choose, maintain, and organise the perfect system for your next British expedition. We'll explore the latest durability standards, including insights into modern material safety, so you can keep your water clean and your kit bone-dry. From rugged titanium to smart modular systems, you'll learn exactly how to kit yourself out for the toughest UK weather.
Key Takeaways
- Learn how to tailor your setup for different environments; comparing high-capacity basecamp solutions with lightweight, portable trail kits.
- Identify the most reliable materials for outdoor water storage, from BPA-free plastics to fire-ready stainless steel options.
- Understand the critical safety differences between potable and non-potable containers to ensure your drinking water remains fresh and safe.
- Discover simple maintenance tricks to remove the "plastic taste" from new bladders and keep your gear performing at its best.
- Build a leak-proof system that withstands the rugged British climate, protecting your rucksack and essential kit from accidental spills.
Understanding Outdoor Water Storage: From Garden Basecamp to Trail
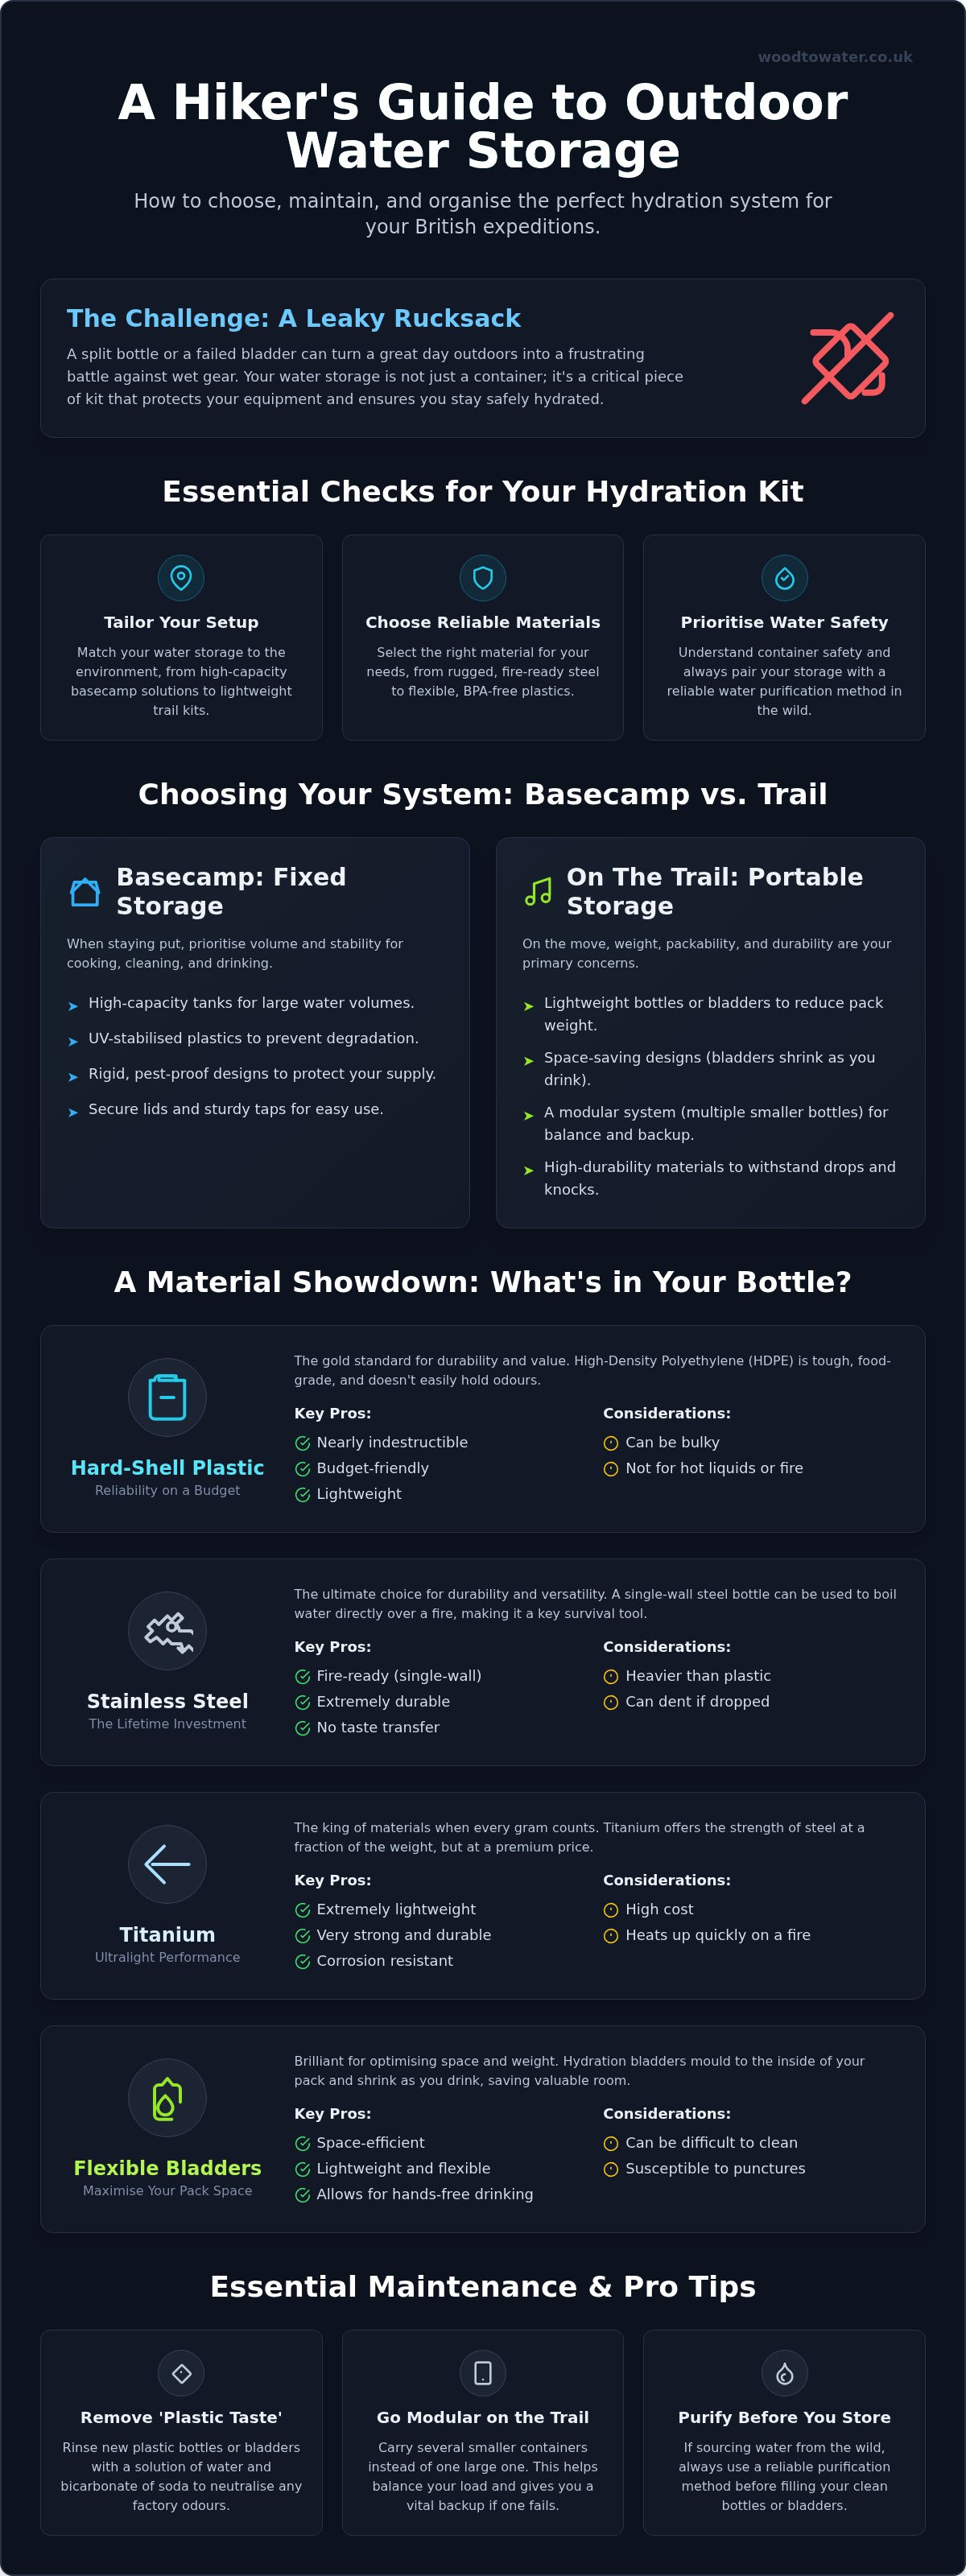
Every successful expedition starts with a solid plan for hydration. Whether you're setting up a semi-permanent camp in a forest or yomping across the moors, your outdoor water storage needs will shift dramatically. A flimsy bottle might survive a gym session; it won't last a weekend in the Highlands. We've seen plenty of cheap plastic containers fail under the pressure of a packed rucksack or the fluctuating temperatures of the British climate. Choosing the right vessel is about more than just holding liquid; it's about ensuring your supply remains clean, accessible, and intact when you're miles from the nearest tap.
Basecamp setups and trail kits require different logic. If you're staying put, volume and stability take priority. On the move, weight management and pack organisation become the primary concerns. High-capacity containers are the backbone of any off-grid camping trip, providing enough water for cooking, cleaning, and drinking without constant trips to a stream. However, if that container isn't built for the rugged British outdoors, you'll likely find yourself dealing with cracks, leaks, or contaminated water before the first night is over.
Fixed Storage for Basecamp and Garden
When you're establishing a base, heavy-duty tanks are your best friend. For long-term setups, look for containers made from UV-stabilised plastic. Even under the often-grey UK sky, UV rays can degrade standard plastics, making them brittle and prone to splitting. Your basecamp storage must also be secure against local wildlife. Mice and other pests can easily chew through thin-walled containers to reach a water source, so choosing a rigid, pest-proof design is essential. Secure lids and sturdy taps make these larger units much easier to manage when you're preparing meals or filling smaller bottles.
Portable Storage for Hiker and Bushcrafter
On the trail, the choice usually falls between soft-sided bladders and rigid bottles. Bladders are excellent for weight efficiency; they shrink as you drink, saving valuable space in your pack. Rigid bottles, particularly those made from stainless steel or heavy-duty polymers, offer unmatched durability. They won't puncture if you drop your pack on sharp gritstone. A modular approach works best here. Using several smaller containers rather than one giant one helps balance your load and provides a backup if one vessel fails. Ensure your chosen bottles fit standard backpack side pockets for easy access. If you're sourcing water from the wild, remember to pair your storage with effective water purification methods to keep things safe. Reliable storage is one of the most vital bushcraft essentials you can carry, providing the foundation for everything else you do in the wild.
Choosing the Right Material for Your Water Container
Material selection is where your outdoor water storage strategy gets technical. It isn't just about the weight on your back; it's about the chemistry of what you're drinking. Whilst modern BPA-free plastics have solved many health concerns, the material you choose still impacts durability and water taste. From the rugged reliability of steel to the packability of soft bladders, each material serves a specific purpose in the British wild. In the UK, where temperatures can swing from freezing to surprisingly humid, your container needs to handle thermal stress without cracking. Choosing the wrong one can lead to metallic-tasting coffee or, worse, a soaked sleeping bag at 2:00 AM.
Hard-Shell Plastics: Reliability on a Budget
HDPE (High-Density Polyethylene) is the gold standard for budget-friendly reliability. It's a food-grade material that doesn't leach chemicals or hold onto smells easily. Look closely at the seams when inspecting a bottle; high-quality containers feature reinforced welds that won't split under pressure. To keep things fresh, a simple rinse with bicarbonate of soda and water will neutralise any lingering "new bottle" scents. These containers are nearly indestructible and handle the knocks of a rocky trail with ease.
Metal Storage: The Lifetime Investment
Stainless steel is the ultimate choice for fire-readiness. A single-wall bottle can be placed directly into fire embers to boil water in an emergency, making it a dual-purpose tool for survival. For winter, vacuum-insulated versions keep tea hot and prevent your supply from freezing. If every gram counts, titanium is king. Serious trekkers often pair their bottles with TOAKS Titanium Cookware to keep their total pack weight as low as possible without sacrificing strength.
Flexible bladders are brilliant for maximising space. They mould to the shape of your bag, which is a huge advantage when you're carrying a lot of gear for a multi-day expedition. They also allow you to sip whilst walking, keeping you hydrated without needing to stop and rummage through your pack. Regardless of the material, always ensure your choice aligns with emergency water supply guidelines to prevent bacterial growth during longer trips. Keeping your containers clean is just as important as the material itself. If you're ready to upgrade your hydration setup, checking out our vetted bushcraft essentials will help you find gear that survives more than just one season.
Potable vs Non-Potable Storage: Keeping Your Supply Safe
It is a common mistake to treat all outdoor water storage as equal. On a serious expedition, you must maintain a strict boundary between potable (drinking) water and non-potable (grey) water. Potable water is your lifeline for hydration and cooking; non-potable water is reserved for hygiene, washing boots, or dousing a fire. Cross-contamination is a silent trip-killer. Even a few drops of untreated stream water entering your main drinking flask can lead to stomach issues that bring your trek to an abrupt end. Keeping these supplies physically separate and clearly identified is the first step in trail safety.
How long can you safely keep water in a portable container? Generally, you should aim to cycle your supply every 24 to 48 hours. Stagnant water, especially in the humid or mild conditions often found in the UK, becomes a breeding ground for bacteria. Before you take a sip, look for tell-tale signs of contamination. Cloudiness, a strange "pond" smell, or a slippery biofilm forming on the inner walls of the bottle are all red flags. If you see any of these, it's time to tip the water out and sterilise the vessel.
Safe Storage Practices for Drinking Water
Algae is a persistent problem for hikers, particularly during the brighter months. Light and warmth act as catalysts for growth, so keep your water containers tucked deep inside your rucksack or use opaque bottles. We recommend a "fill and flush" routine: always rinse your container with a small amount of purified water before a full refill. Labelling is also vital. Use different coloured tape or permanent markers to distinguish your "clean" bottles from those used for collecting raw water. Always follow Leave No Trace principles by disposing of any grey water at least 200 feet away from lakes or streams to protect the local ecosystem.
Purifying Stored Water in the Field
Storage and purification are two sides of the same coin. Simply putting water in a bottle doesn't make it safe to drink. If you're sourcing from the wild, you need a reliable way to treat it. Boiling remains the most effective method for killing pathogens. High-performance camping gas stoves allow you to boil and sterilise your supply quickly, even in challenging weather. To ensure you aren't carrying unnecessary weight, consult our Ultimate Guide to Camping Gas for advice on choosing the most efficient fuel for your trip. Combining mechanical filtration with boiling provides the highest level of security for your stored supply.
Essential Maintenance: Cleaning and Organising Your Water Gear
Neglecting your kit is a recipe for disaster. If you ignore your outdoor water storage after a trip, you're inviting mould and bacteria to take up residence in the damp corners of your gear. In the UK, where humidity is often high, containers rarely dry out on their own without a bit of help. Regular maintenance ensures your water always tastes fresh and your equipment lasts for years rather than a single season. It's a simple habit that separates the seasoned explorer from the novice.
New hydration bladders often come with a persistent "plastic taste" that can ruin even the best-brewed trail coffee. To fix this, fill the bladder with warm water and a squeeze of lemon juice or a tablespoon of bicarbonate of soda. Let it soak for a few hours before rinsing thoroughly. For better pack organisation, always place your heaviest water containers close to your back and centred between your shoulder blades. This maintains your centre of gravity and prevents the pack from pulling you backwards on steep Scottish ascents.
Step-by-Step Sterilisation Guide
Natural solutions like bicarbonate of soda and white vinegar are brilliant for routine cleaning; they're effective and won't leave behind harsh chemical residues. For a deeper clean, especially after sourcing from wild water, use dedicated sterilisation tablets. Reaching the tricky corners of bladders and the inside of long drinking hoses requires a flexible cleaning brush. Don't forget to scrub the bite valve, as this is where most bacteria accumulate. Hang your bladder upside down with a kitchen whisk or dedicated spacer inside to ensure maximum airflow and complete drainage.
Winter Care: Preventing Frozen Supplies
British winters can be unforgiving on hydration systems. To prevent ice blockages in your hose, blow the water back into the reservoir after every sip and use a neoprene insulation sleeve. Never store a full container in a freezing garage or shed. Water expands as it freezes; this pressure will easily split a rigid HDPE bottle or burst the seams of a high-quality bladder. If you're heading out in sub-zero temperatures, keep your bottles tucked inside your jacket or amongst your spare layers to use your body heat as a natural insulator. Keeping your kit in top condition is easy when you have the right tools. Explore our curated bushcraft essentials to find the most durable cleaning and storage accessories for your next outing.
Expedition-Ready Solutions: Why Quality Storage Matters
Choosing high-quality gear isn't just about reading a spec sheet. It's about the confidence you feel when you're three days into a trek and the rain is lashing down. Reliable outdoor water storage is the backbone of your hydration strategy. If your container fails, your entire plan falls apart. We believe in gear that serves multiple purposes. A single-wall steel bottle doesn't just hold water; it acts as a kettle over a fire. This versatility is what makes certain items true bushcraft essentials. By investing in vetted equipment, you're buying peace of mind for every mile of the trail.
In the rugged British outdoors, your kit takes a beating. From the abrasive gritstone of the Peaks to the freezing nights in the Highlands, your vessels need to be tough. We've already discussed the merits of different materials and the importance of maintenance. Now, it's about bringing that knowledge together to build a system that works for you. A curated kit ensures you aren't carrying dead weight. It means every item in your pack has earned its place through durability and functional design.
The Wood To Water Outdoors Curation Process
We don't just stock items because they look good in a catalogue. Our team personally tests every piece of kit in the actual UK environment. We've seen how "budget" supermarket bottles fail when the temperature drops or when they're shoved into a tightly packed rucksack. Reliability is our primary metric. We look for reinforced seams, high-grade materials, and designs that actually work for the active hiker. Our curation process filters out the fluff; we ensure that whatever you buy from us is ready for the trail. We value utility and longevity over temporary savings.
Ready for Your Next Adventure?
Before you head out, take a moment to review your current hydration setup. Is your bottle truly leak-proof? Do you have a way to separate your drinking supply from your wash water? Smart water management is about being proactive. Here is a final checklist for your next outdoor water storage purchase:
- Is the material food-grade and BPA-free for safe drinking?
- Can the container withstand a drop on hard, rocky ground?
- Does the shape fit comfortably in your pack's side pockets?
- Can the system be easily cleaned and dried at home?
If you're unsure about which solution fits your specific needs, we're here to help. You can explore the full Wood To Water Outdoors collection for expert-vetted gear and advice. Whether you're planning a local overnight stay or a massive national expedition, the right container makes all the difference. Stay hydrated, stay safe, and enjoy the wild.
Gear Up for Your Next Expedition
Choosing the right vessel is about balancing weight with the rugged reality of the British landscape. We've explored how material choice impacts both taste and durability; we've also highlighted the vital need to keep your drinking supply separate from grey water. A simple maintenance routine ensures your kit stays fresh and functional for years. Reliable outdoor water storage isn't just a convenience; it's a fundamental part of your safety kit that protects your gear and your health.
Our team lives and breathes the outdoors. We only stock high-performance bushcraft equipment that has been expertly vetted by fellow enthusiasts who know exactly what works. With reliable UK-wide delivery, you can get high-quality kit sent straight to your door before your next trip. It's time to stop worrying about leaks and start focusing on the path ahead.
Ready to upgrade your hydration system? Explore our curated range of durable outdoor water storage and bushcraft gear to find equipment that won't let you down. We're excited to see where your next adventure takes you!
Frequently Asked Questions
How long can I safely store water in a plastic outdoor container?
You can safely store water in a portable plastic container for 24 to 48 hours before you should refresh the supply. For larger, fixed outdoor water storage setups used at a basecamp, water can last longer if stored in a cool, dark place; however, you must check for signs of algae or biofilm. Stagnant water in mild British conditions quickly becomes a breeding ground for bacteria if left for several days without cycling.
Is it better to use a hydration bladder or a hard water bottle for hiking?
Choosing between a hydration bladder and a hard bottle depends on whether you value sipping on the move or rugged durability. Bladders are excellent for weight distribution and convenience during high-energy treks, whilst hard bottles are nearly indestructible and easier to clean. Many hikers use a hybrid approach, carrying a bladder for hydration and a rigid bottle as a backup for camp use or emergency boiling.
How do I stop my outdoor water storage from tasting like plastic?
To remove the plastic taste from a new container, soak it in a solution of warm water and bicarbonate of soda for several hours. This natural method neutralises the "new gear" smell without using harsh chemicals that could damage the material. Rinsing with a splash of lemon juice afterwards also helps to freshen the vessel and ensures your water tastes like water rather than a factory floor.
Can I use a metal water bottle to boil water over a campfire?
You can use a metal water bottle to boil water over a fire only if it is a single-wall design. Never attempt this with a vacuum-insulated bottle; the trapped air between the walls will expand and cause the container to explode. A single-wall stainless steel or titanium bottle is a brilliant multi-purpose tool that allows you to sterilise water directly in the embers during an emergency survival situation.
What is the best way to clean a hydration bladder hose?
The most effective way to clean a hydration bladder hose is to use a long, flexible wire brush specifically designed for hydration systems. Run the brush through the tube with warm, soapy water to scrub away any slime or buildup. For a deeper clean, soak the hose in a mild sterilisation solution and always hang it vertically to ensure every drop of moisture drains out before you pack it away.
Do I need to treat tap water if I am storing it for a camping trip?
You don't usually need to treat tap water if you're using it within a couple of days for a standard camping trip. However, if you are filling a large outdoor water storage tank for an extended off-grid stay, adding a small amount of water purification treatment is a sensible precaution. This prevents bacterial growth over time, especially if the container is exposed to sunlight or fluctuating temperatures whilst at camp.
How do I prevent my water from freezing whilst winter camping in the UK?
Prevent your water from freezing by keeping your bottles inside your jacket or tucked deep amongst your spare layers in your rucksack. If you use a hydration bladder, blow the water back into the reservoir after every sip to keep the hose clear of ice. You can also use insulated sleeves for hoses and valves to protect your supply against the sharp British frost during winter expeditions.
What does "potable" water storage actually mean for a camper?
"Potable" water storage refers to containers specifically designed and certified to hold water that is safe for human consumption. These vessels are made from food-grade materials that won't leach harmful chemicals into your drink. In a camp environment, always keep your potable containers separate from "grey water" vessels used for hygiene or fire dousing to avoid accidental contamination and the risk of stomach issues on the trail.